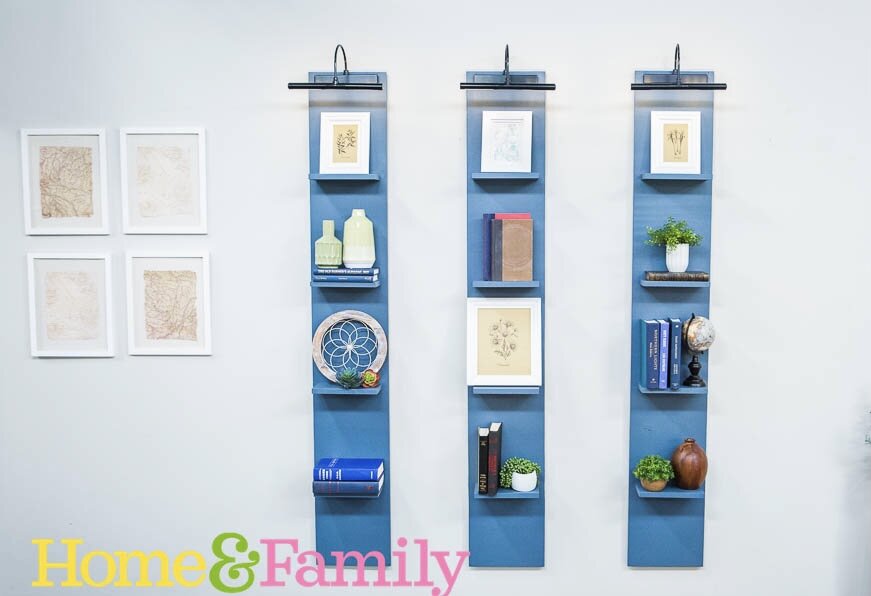
Floating Shelves

I’ve always loved custom built-in bookshelves, they make a room cozy with a certain level of sophistication. They are also…..incredibly expensive to install! The fact you can’t take them with you if you ever move adds insult to injury! So, to address both those issues, I’ve created these hanging customizeable bookshelves. They’re made out of simple wood planks, you can change them to whatever size you need and hang as many or as few as you want!
MATERIALS

Floating shelf brackets
Dowel jig (optional)
One 1” x 12” wood board cut to 72”
Four 1” x 6” wood board cut to 9”
Battery operated picture light (optional)
Drill
Drill bit or bit same width as shelf bracket peg
½” screws
Ruler
Pencil
Paint in desired color (optional)
Paint brush or paint roller and tray (optional)
French cleat
Wooden shims or scrap wood
Hot glue gun and glue sticks
STEPS
If you are going to want your shelves painted, go ahead and paint all the pieces before you get started.
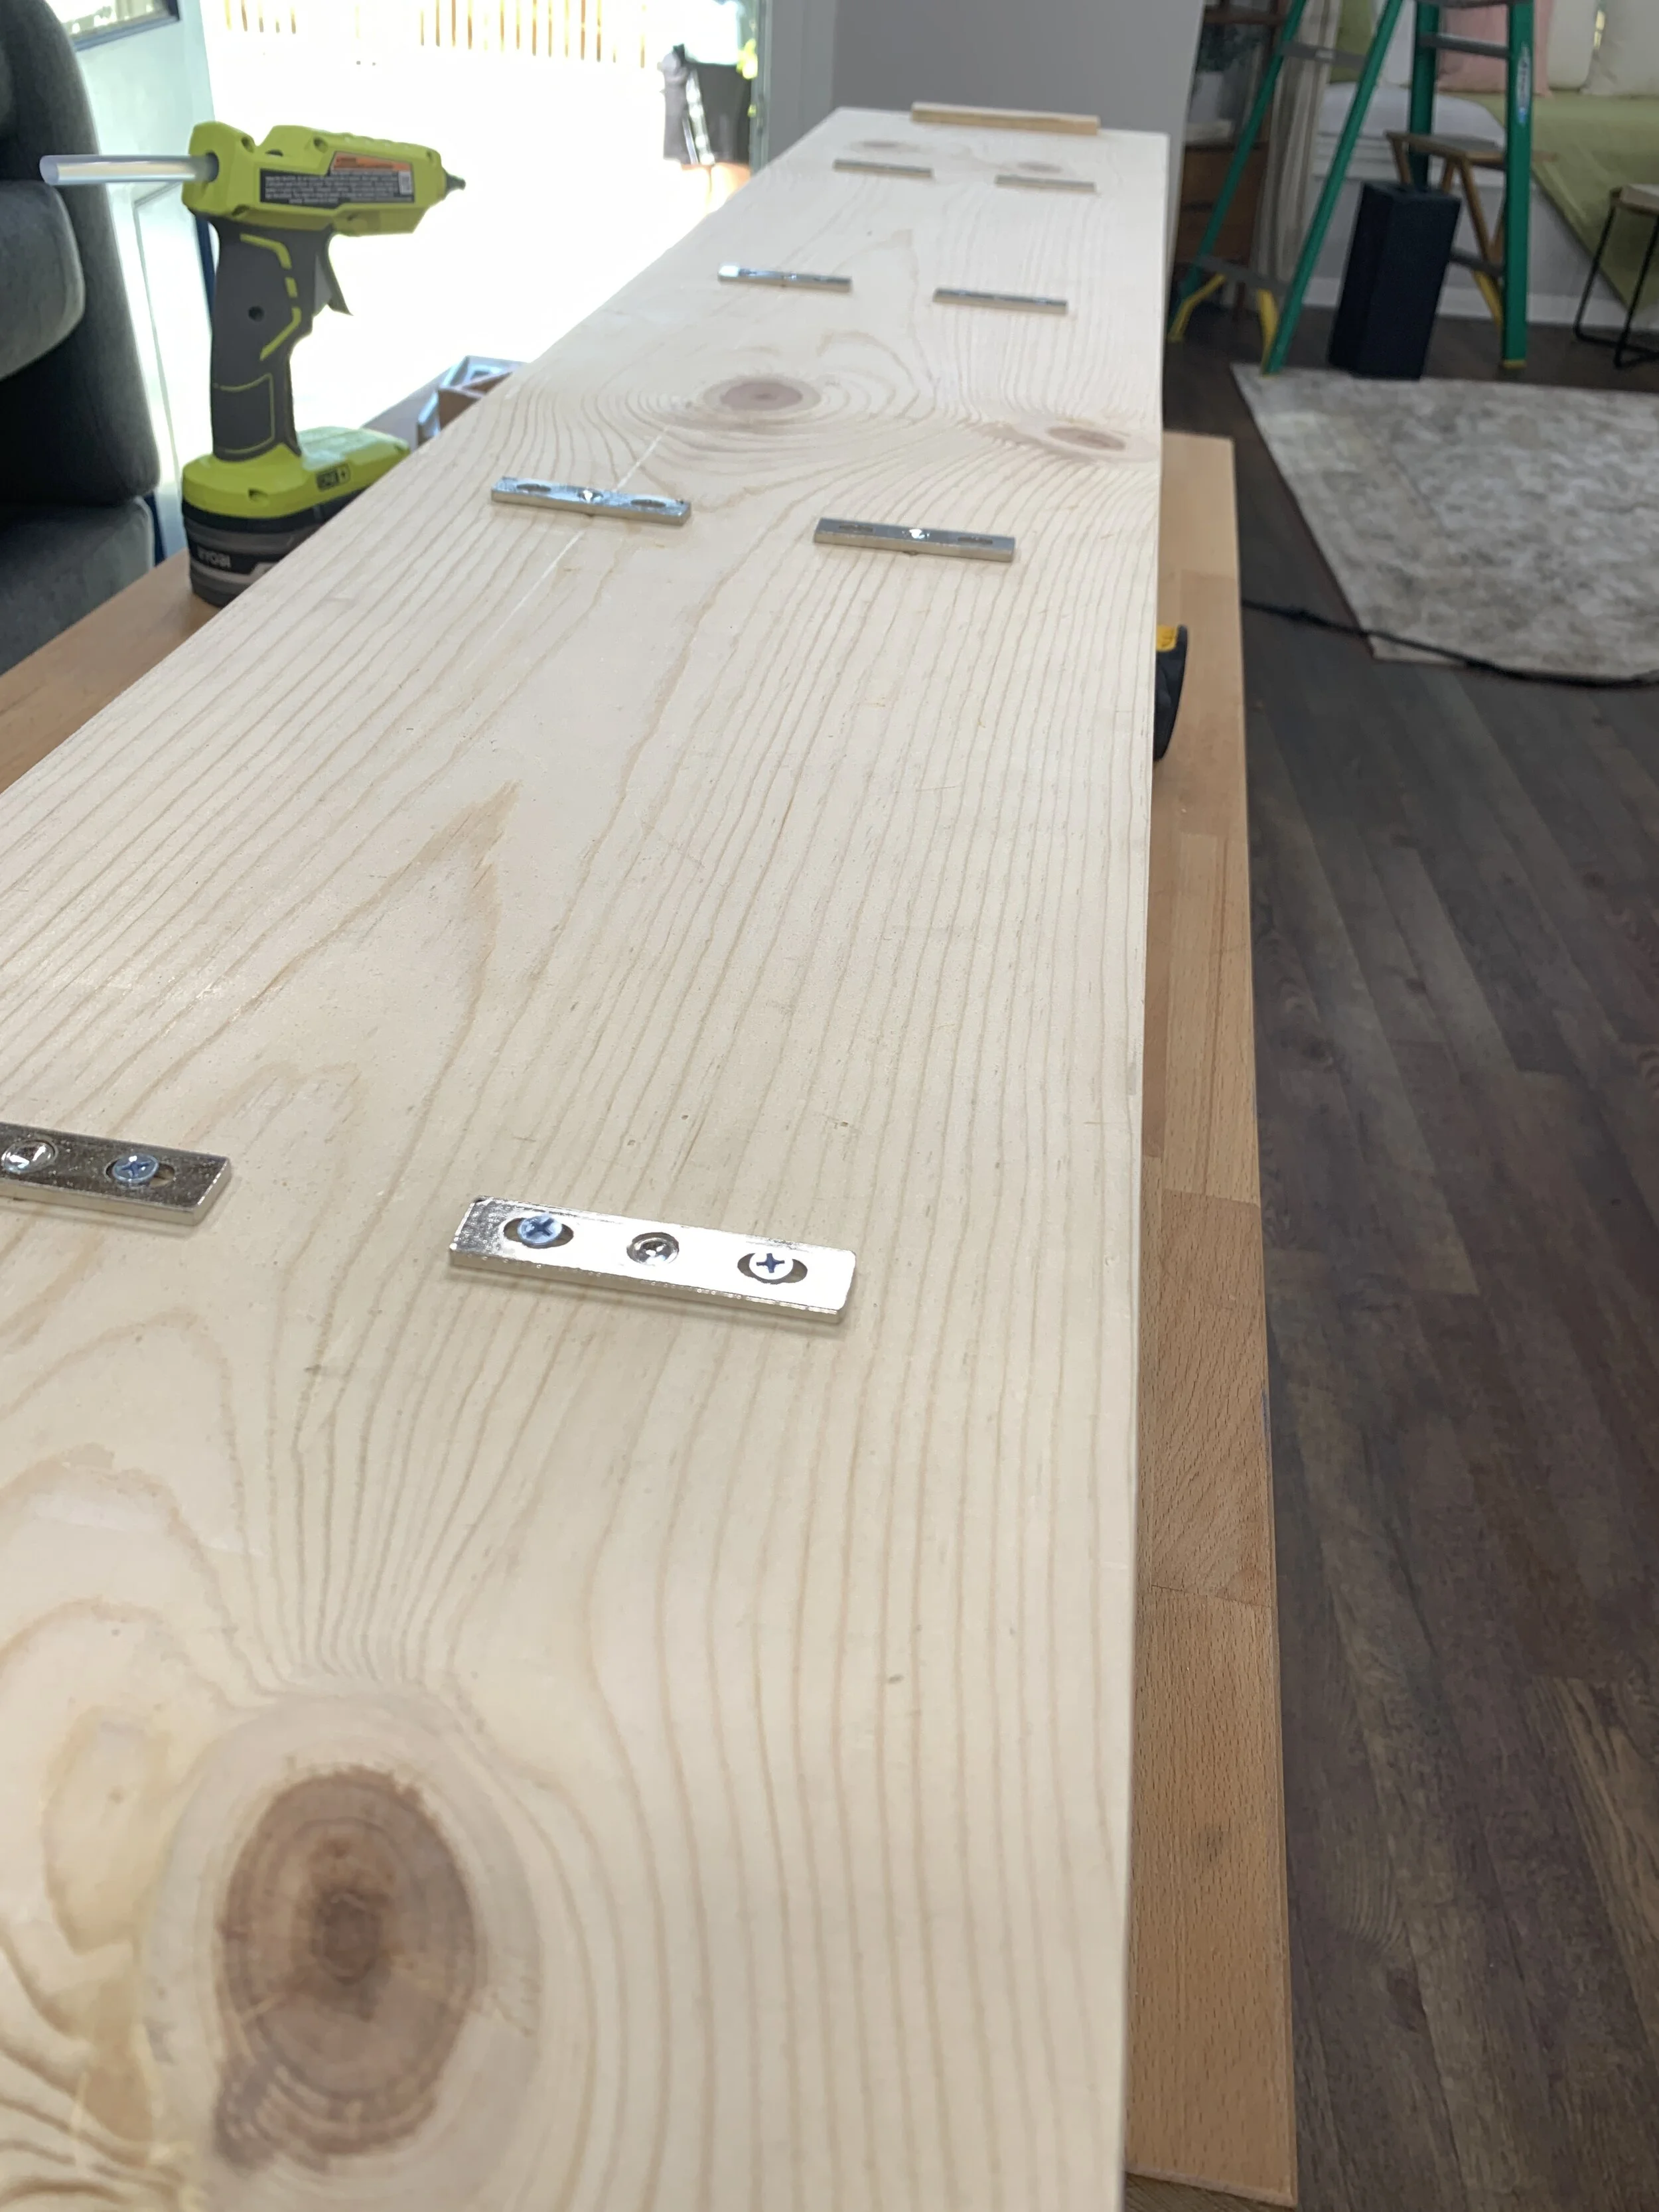
Decide where you want your shelves and mark it with a line on the 12” backboard with a pencil and ruler. Make sure that your line is straight and parrallel. If you have a speed square, it’s a good time to pull it out!
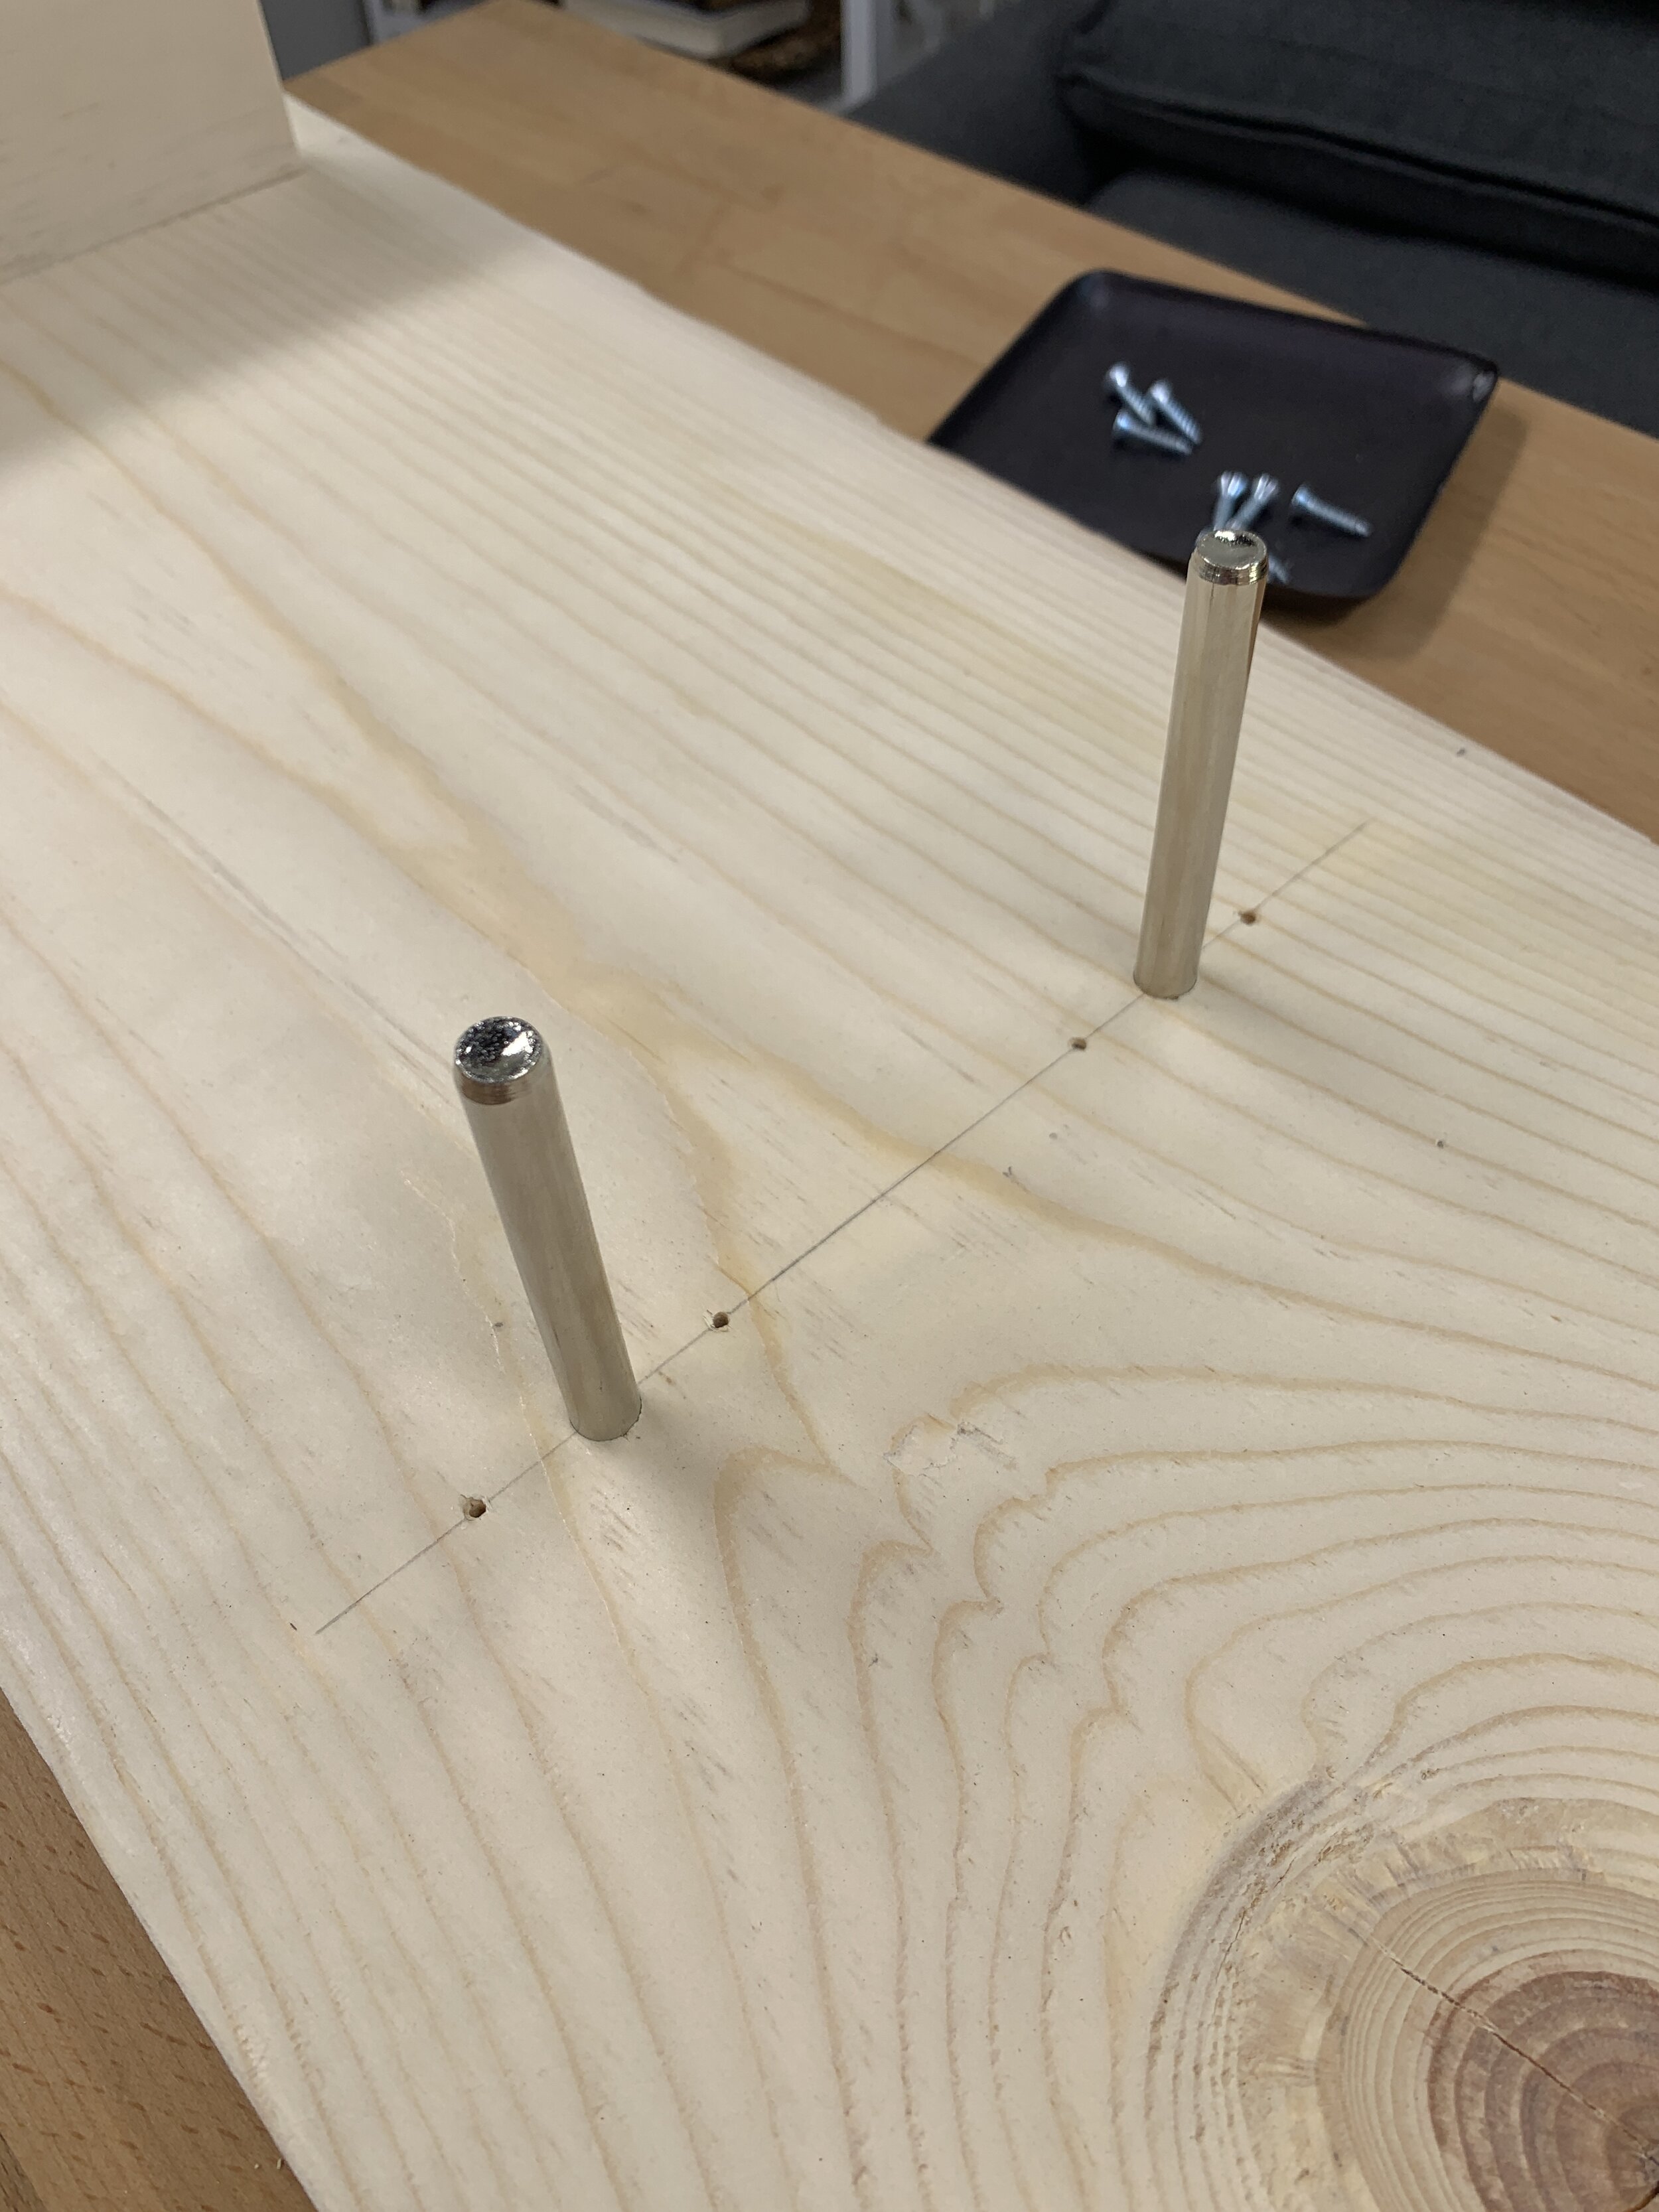
Mark where the two posts will go on each line. Measure in from one edge of the backboard 3.5” and make a mark. Then measure 5” from the first mark and make a second. Double check to make sure that there is then another 3.5” to the other edge. This is where your peg brackets will go. (The mark is where the peg is, not where the edge of the bracket is.)
Now, you can just screw the brackets right on to the front of the backboard, but there will be a little gap between the shelf and the back, which was a little irritating to me. If it’s irritating to you too, follow these steps for a seamless union. If your less type A, just screw the brackets on to the front!
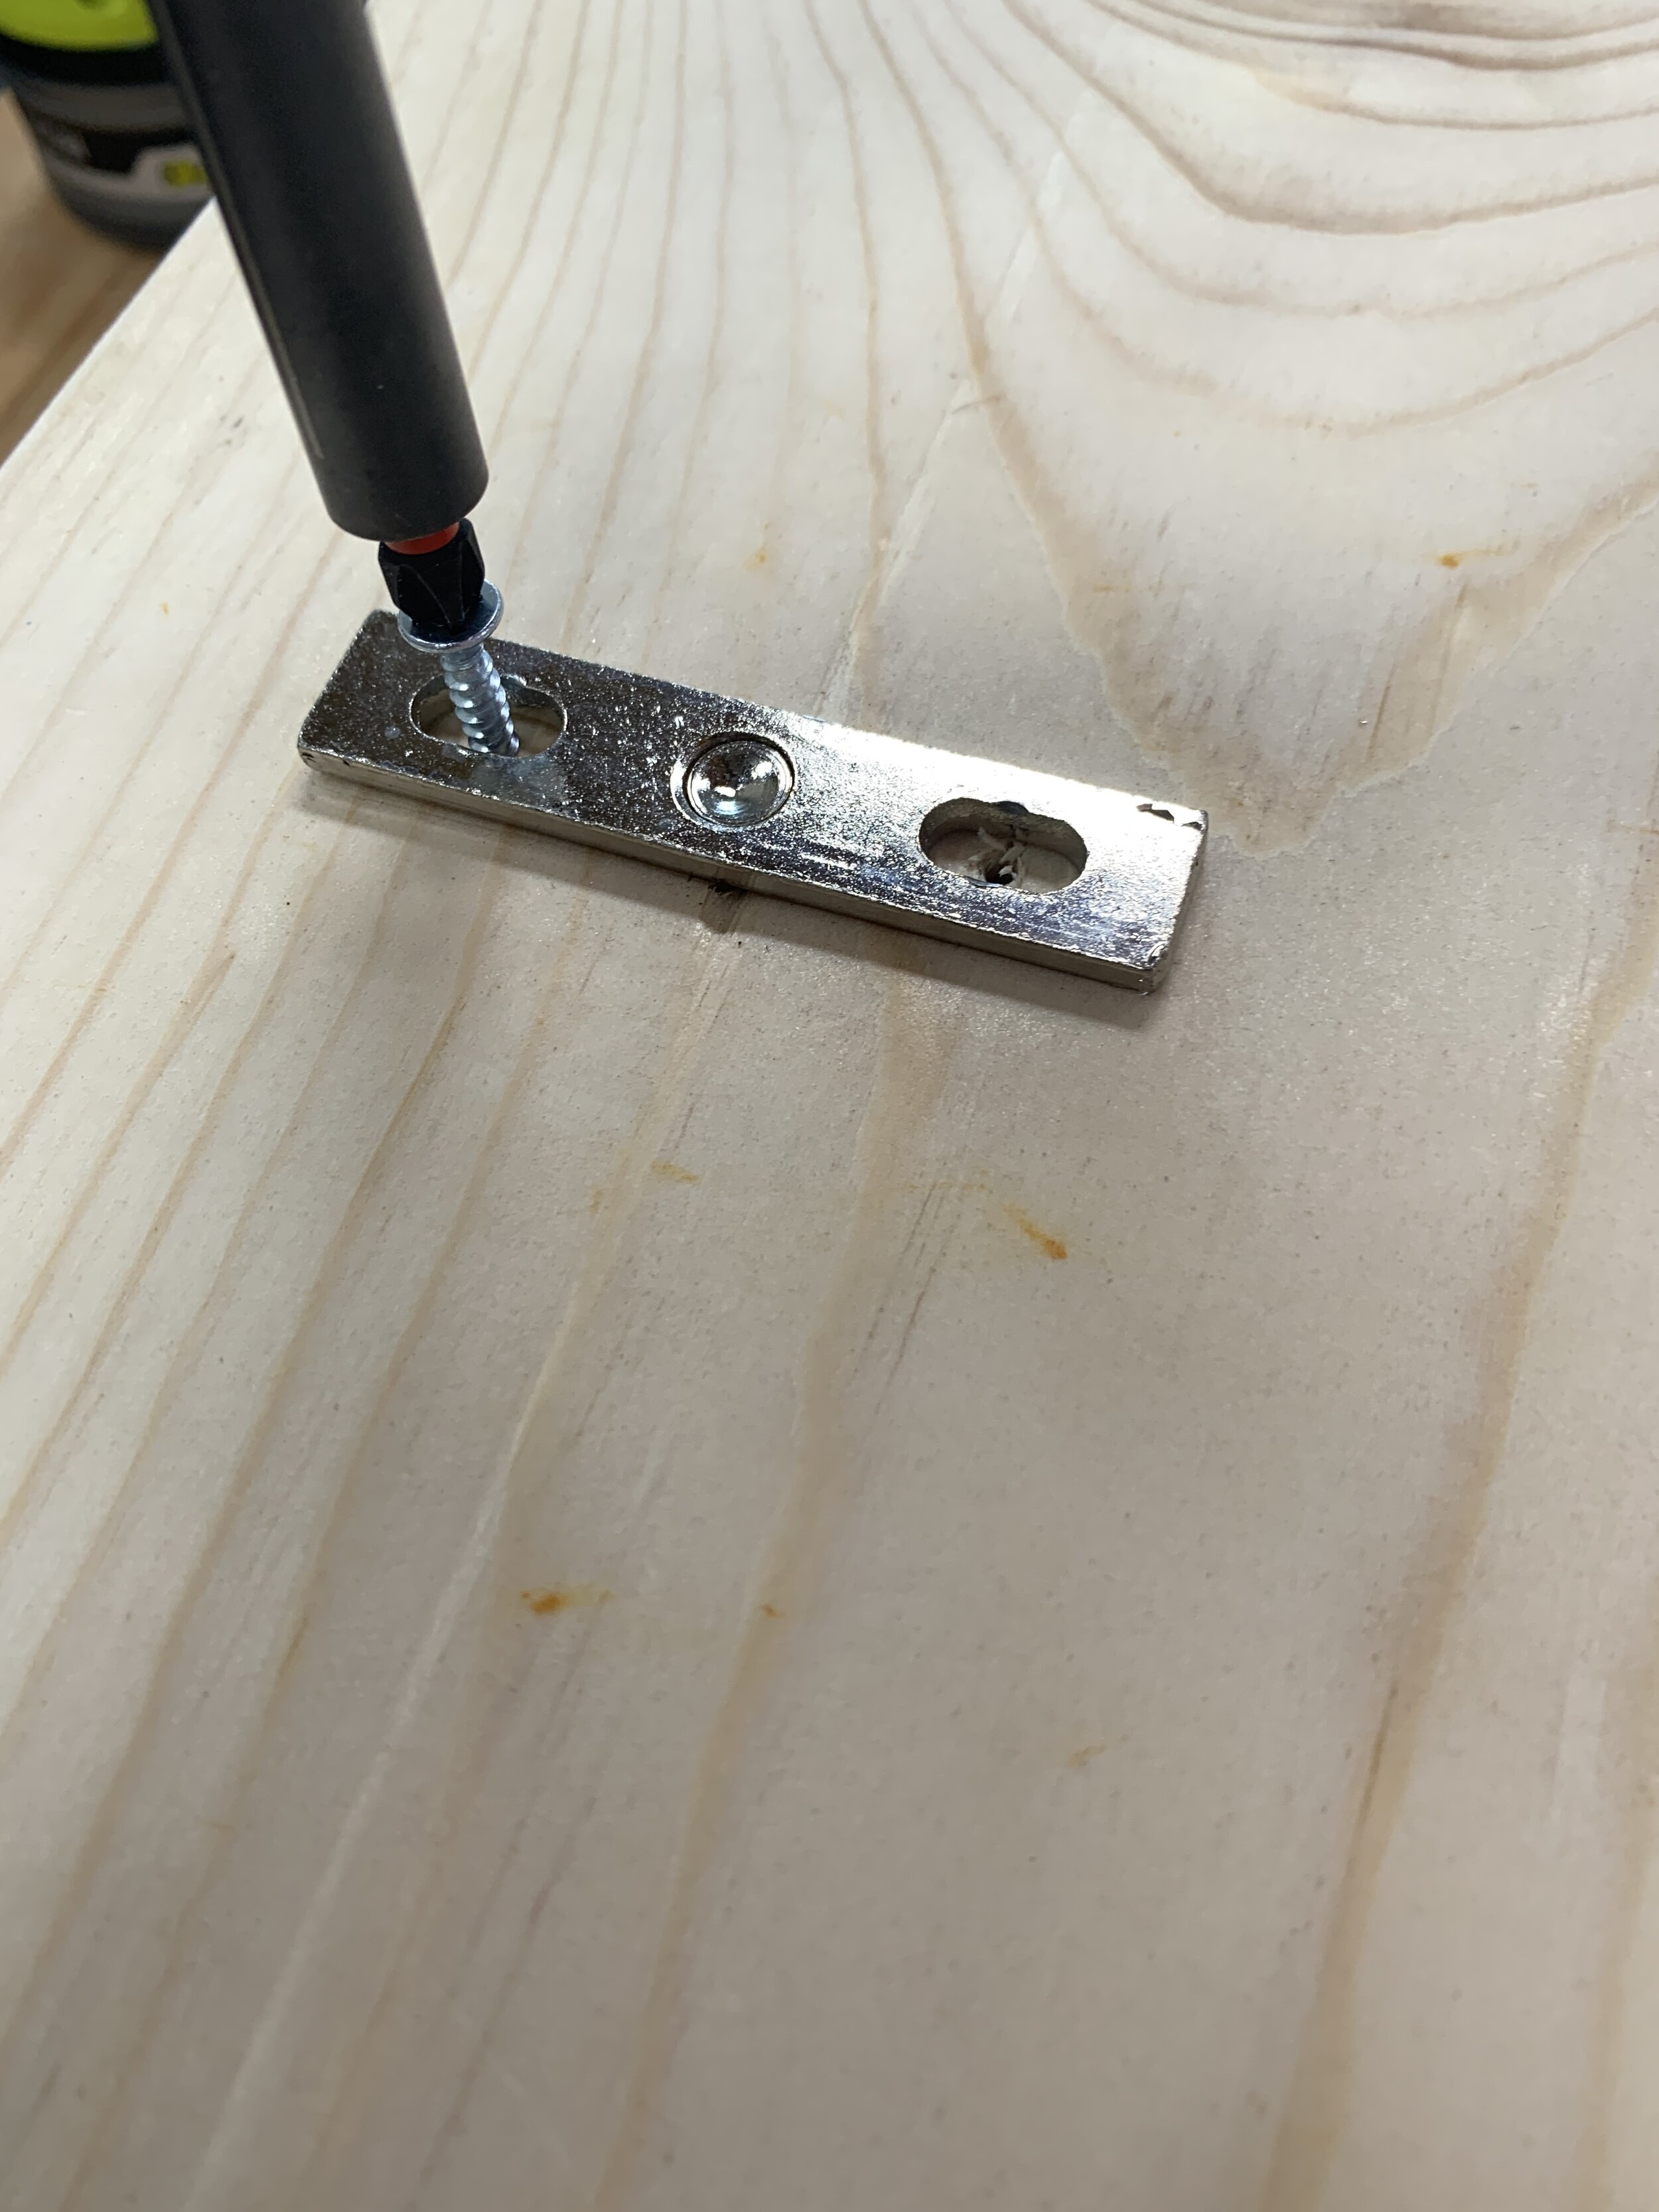
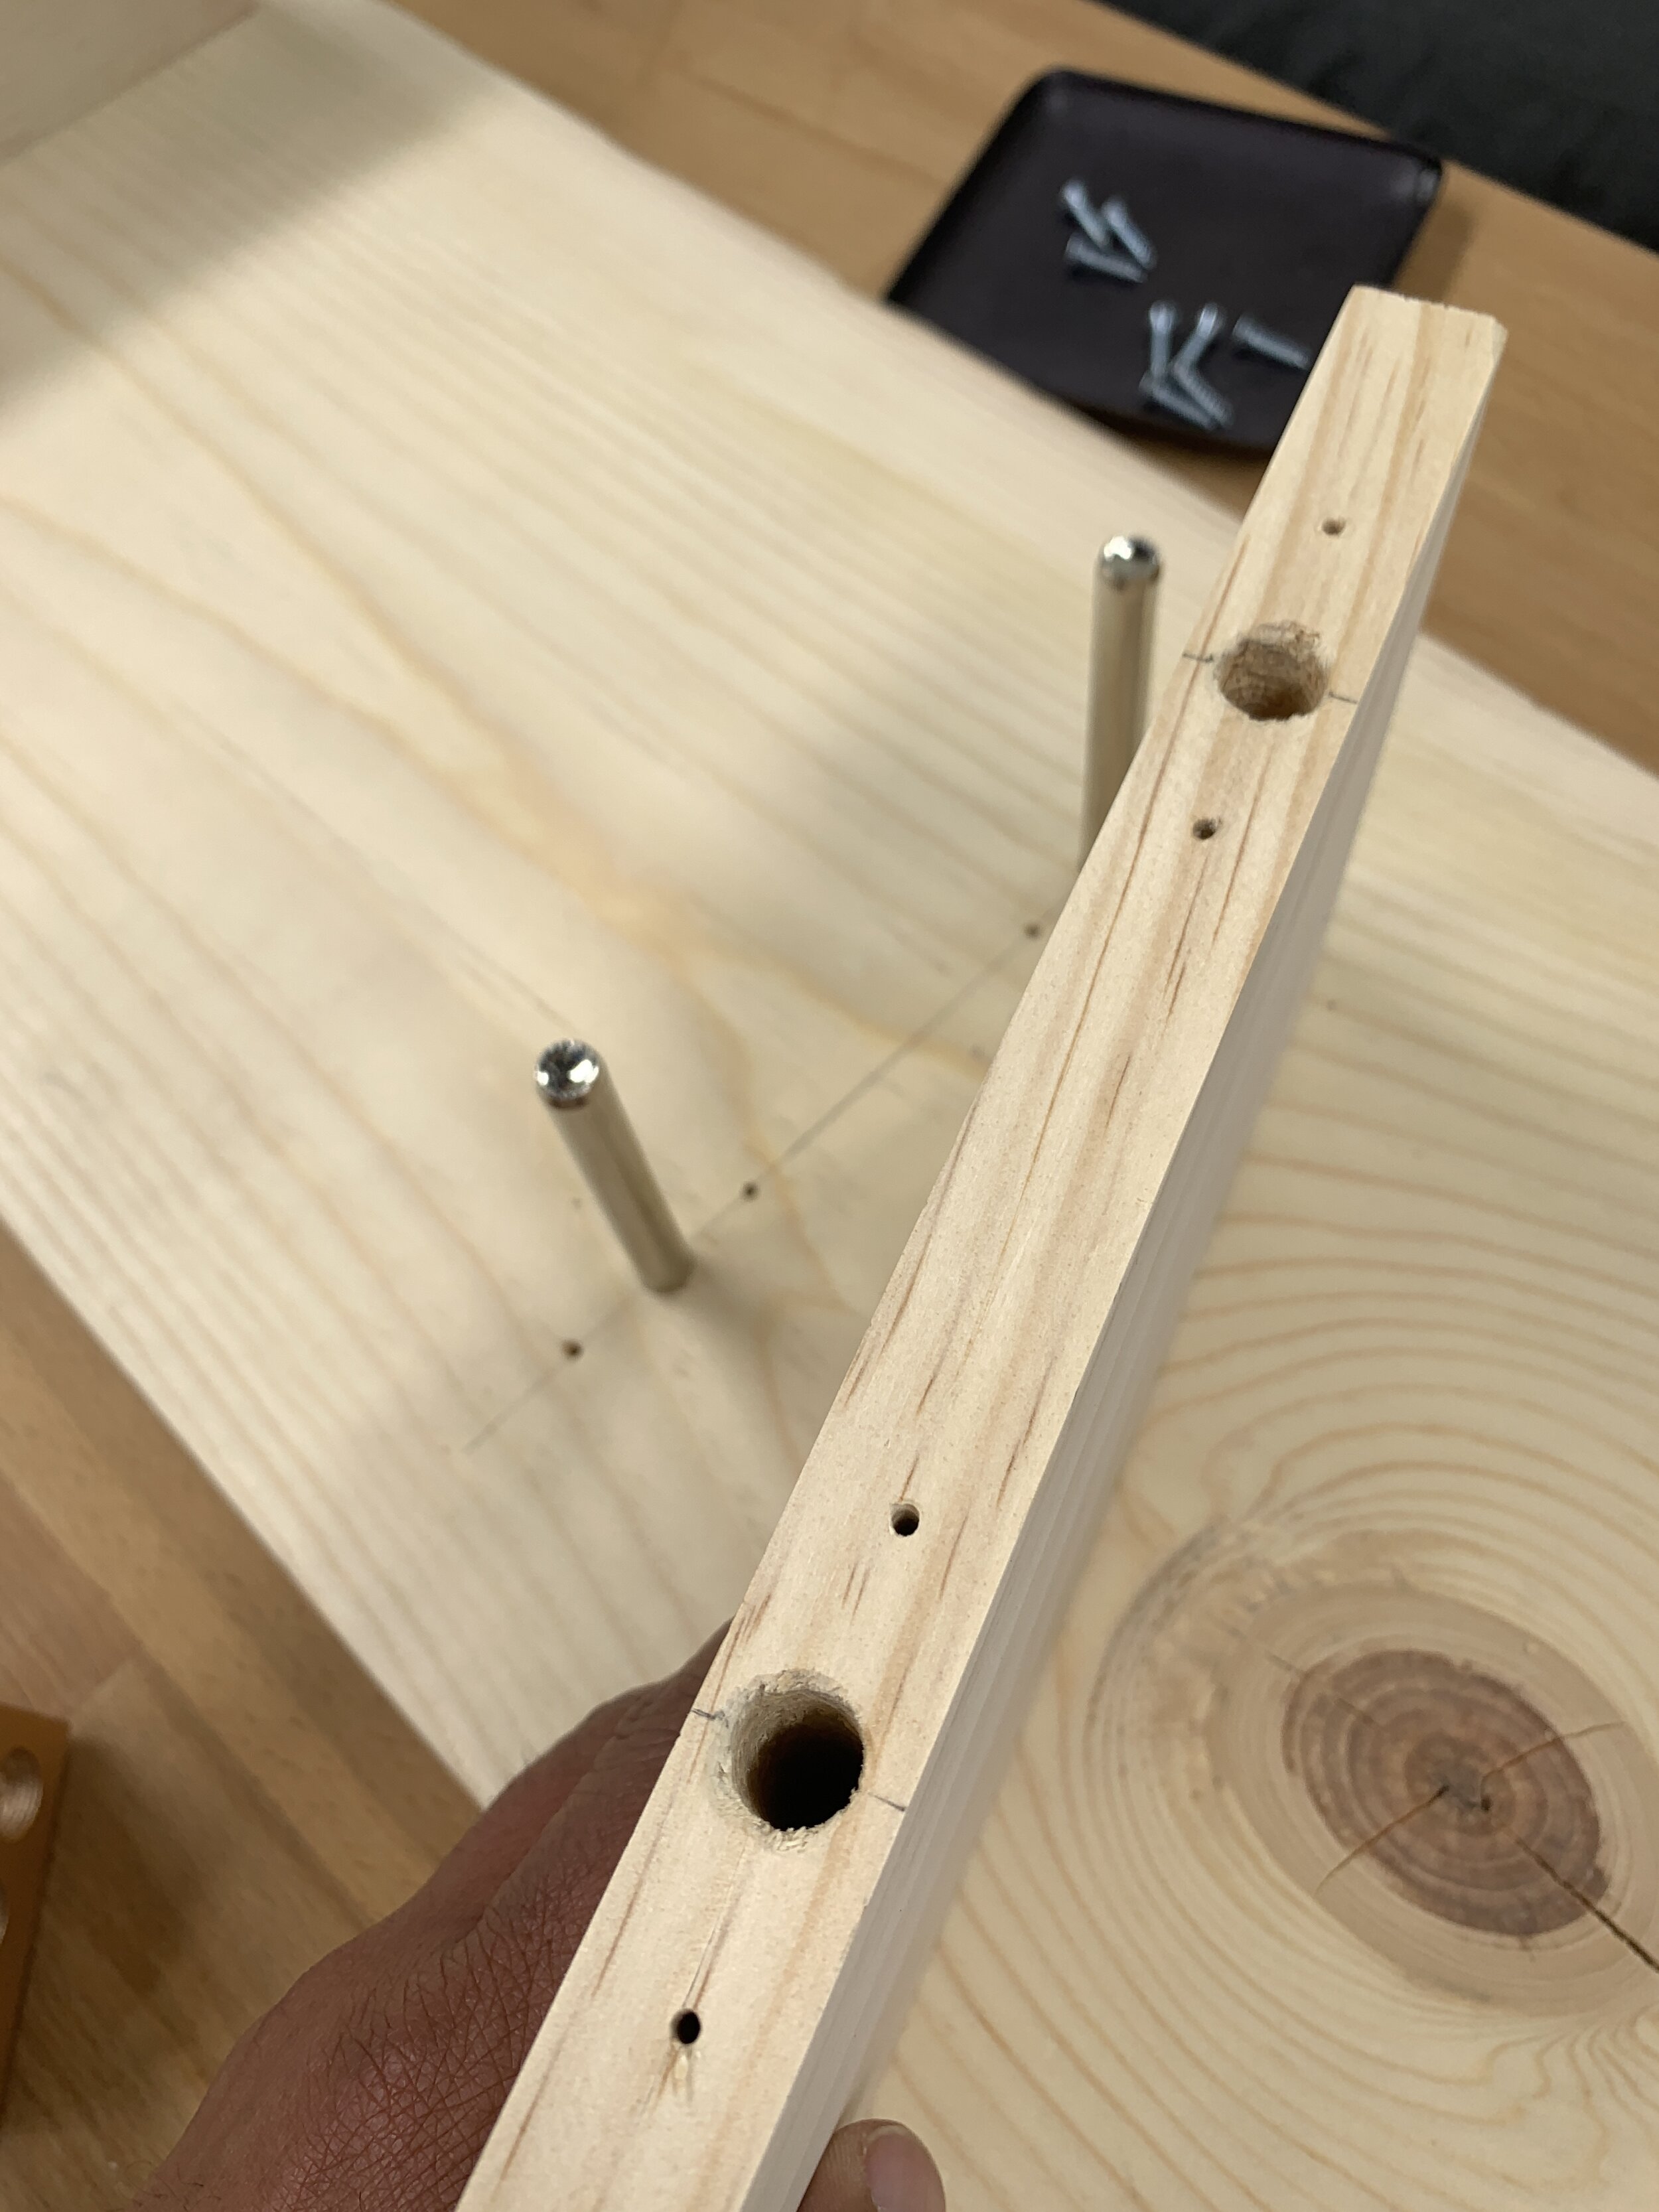
Drill two holes through the backboard where you made each mark with a bit that is the same size as the posts on your shelf brackets.
Slip the brackets through from the back and secure on the back with screws.
Mark in 2” from the edge on the 9” back of each shelf, this is where the pegs will go in.
If you have a dowel jig, attach it securely to the 1” side of the board aligned with the mark and drill all the way in. If not, just drill by hand, but be careful to drill straight down so your bit doesn’t come through the side. Repeat for each hole needed.

Slide each shelf onto its pair of pegs.

If you’re using a picture light, secure it onto the top of each backboard according to the package direcitons.
Hot glue shims or scrap wood near the bottom on the backside of each backboard to keep the whole shelf offset from the wall when it hangs. This accommodates for the french cleat.
Attach the top half of each French cleat near the top of each backboard on the backside. Attach the bottom half of the French cleat in place on the wall where you’d like it to hang.
Hang the shelves and enjoy!