
Embroidery Hoop Urns
HHAF6123-180305-135957 (3)
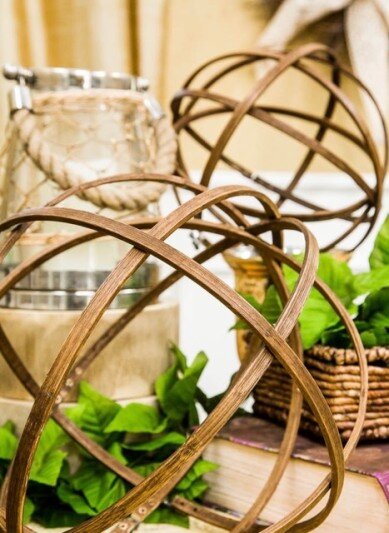
One sees these in every designer shop these days - lovely old world orbs. They’re perched on top of books, nestled in a planter with ivy, or perched upon a candlestick. Well, here’s how you can get that same look at home for merely the cost of a few embroidery hoops.

IMG_5822
MATERIALS
3 embroidery hoops, all the same sizeStain (optional)Glue Gun
STEPS

HHAF6123-180305-153446
If desired, stain your embroidery hoops. Separate the inner and outer rings and stain them on all sides and edges. I think the natural blond wood is beautiful, so if you’re not in the mood to get your hands dirty, than don’t!

IMG_5807
Place one of the inner hoops crosswise inside one of the outer hoops. Secure in place with hot glue at top and bottom.
IMG_5809
Place another interior hoop inside the first two, dividing the space between the two into thirds. Again, secure with hot glue.

IMG_5810
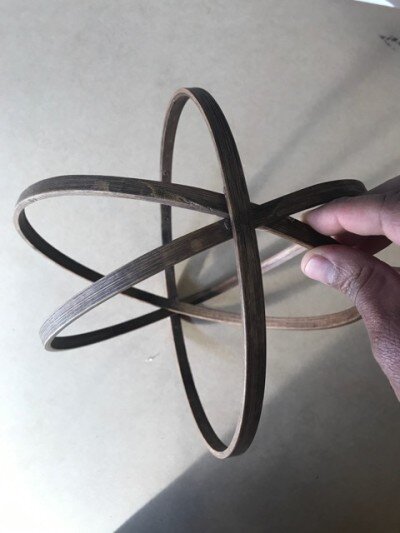
Take an exterior hoop and place it over the first three hoops positioning it between the last one and the first one. Secure with hot glue.

IMG_5811
Take the remaining out hoop and loosen the latch. Place it around the middle of the assembled hoop (this may take a little persuasion). Once in place, tighten the latch and add a drop of hot glue where the hoop comes in contact with the other hoops. You’ll have one inner hoop left over.

IMG_5820
Arrange them as you will!