
Paint Stick Lamp Shade
Everyone has a lamp shade that has seen better days. Instead of tossing it, why not head down to your paint store, grab some stirrers and give your shade a new lease on life.
IMG_2603

IMG_2615 (1)
MATERIALS
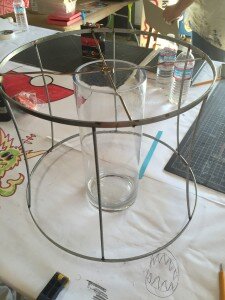
Lamp shade - you want a fabric lampshade that has a wire frame underneath, unfortunately paper shades won't work for this. Also, the more cylindrical the better.
Paint Stirrers - Get these at any paint shop, they'll often give them away for free since they have their name printed on them. Just make sure that one side is blank.
Glue or glue gun
STEPS
IMG_2607
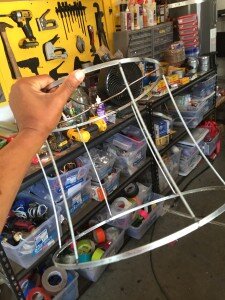
Strip the fabric off to get down to the wire frame. It should all peel off pretty easily.
IMG_2612
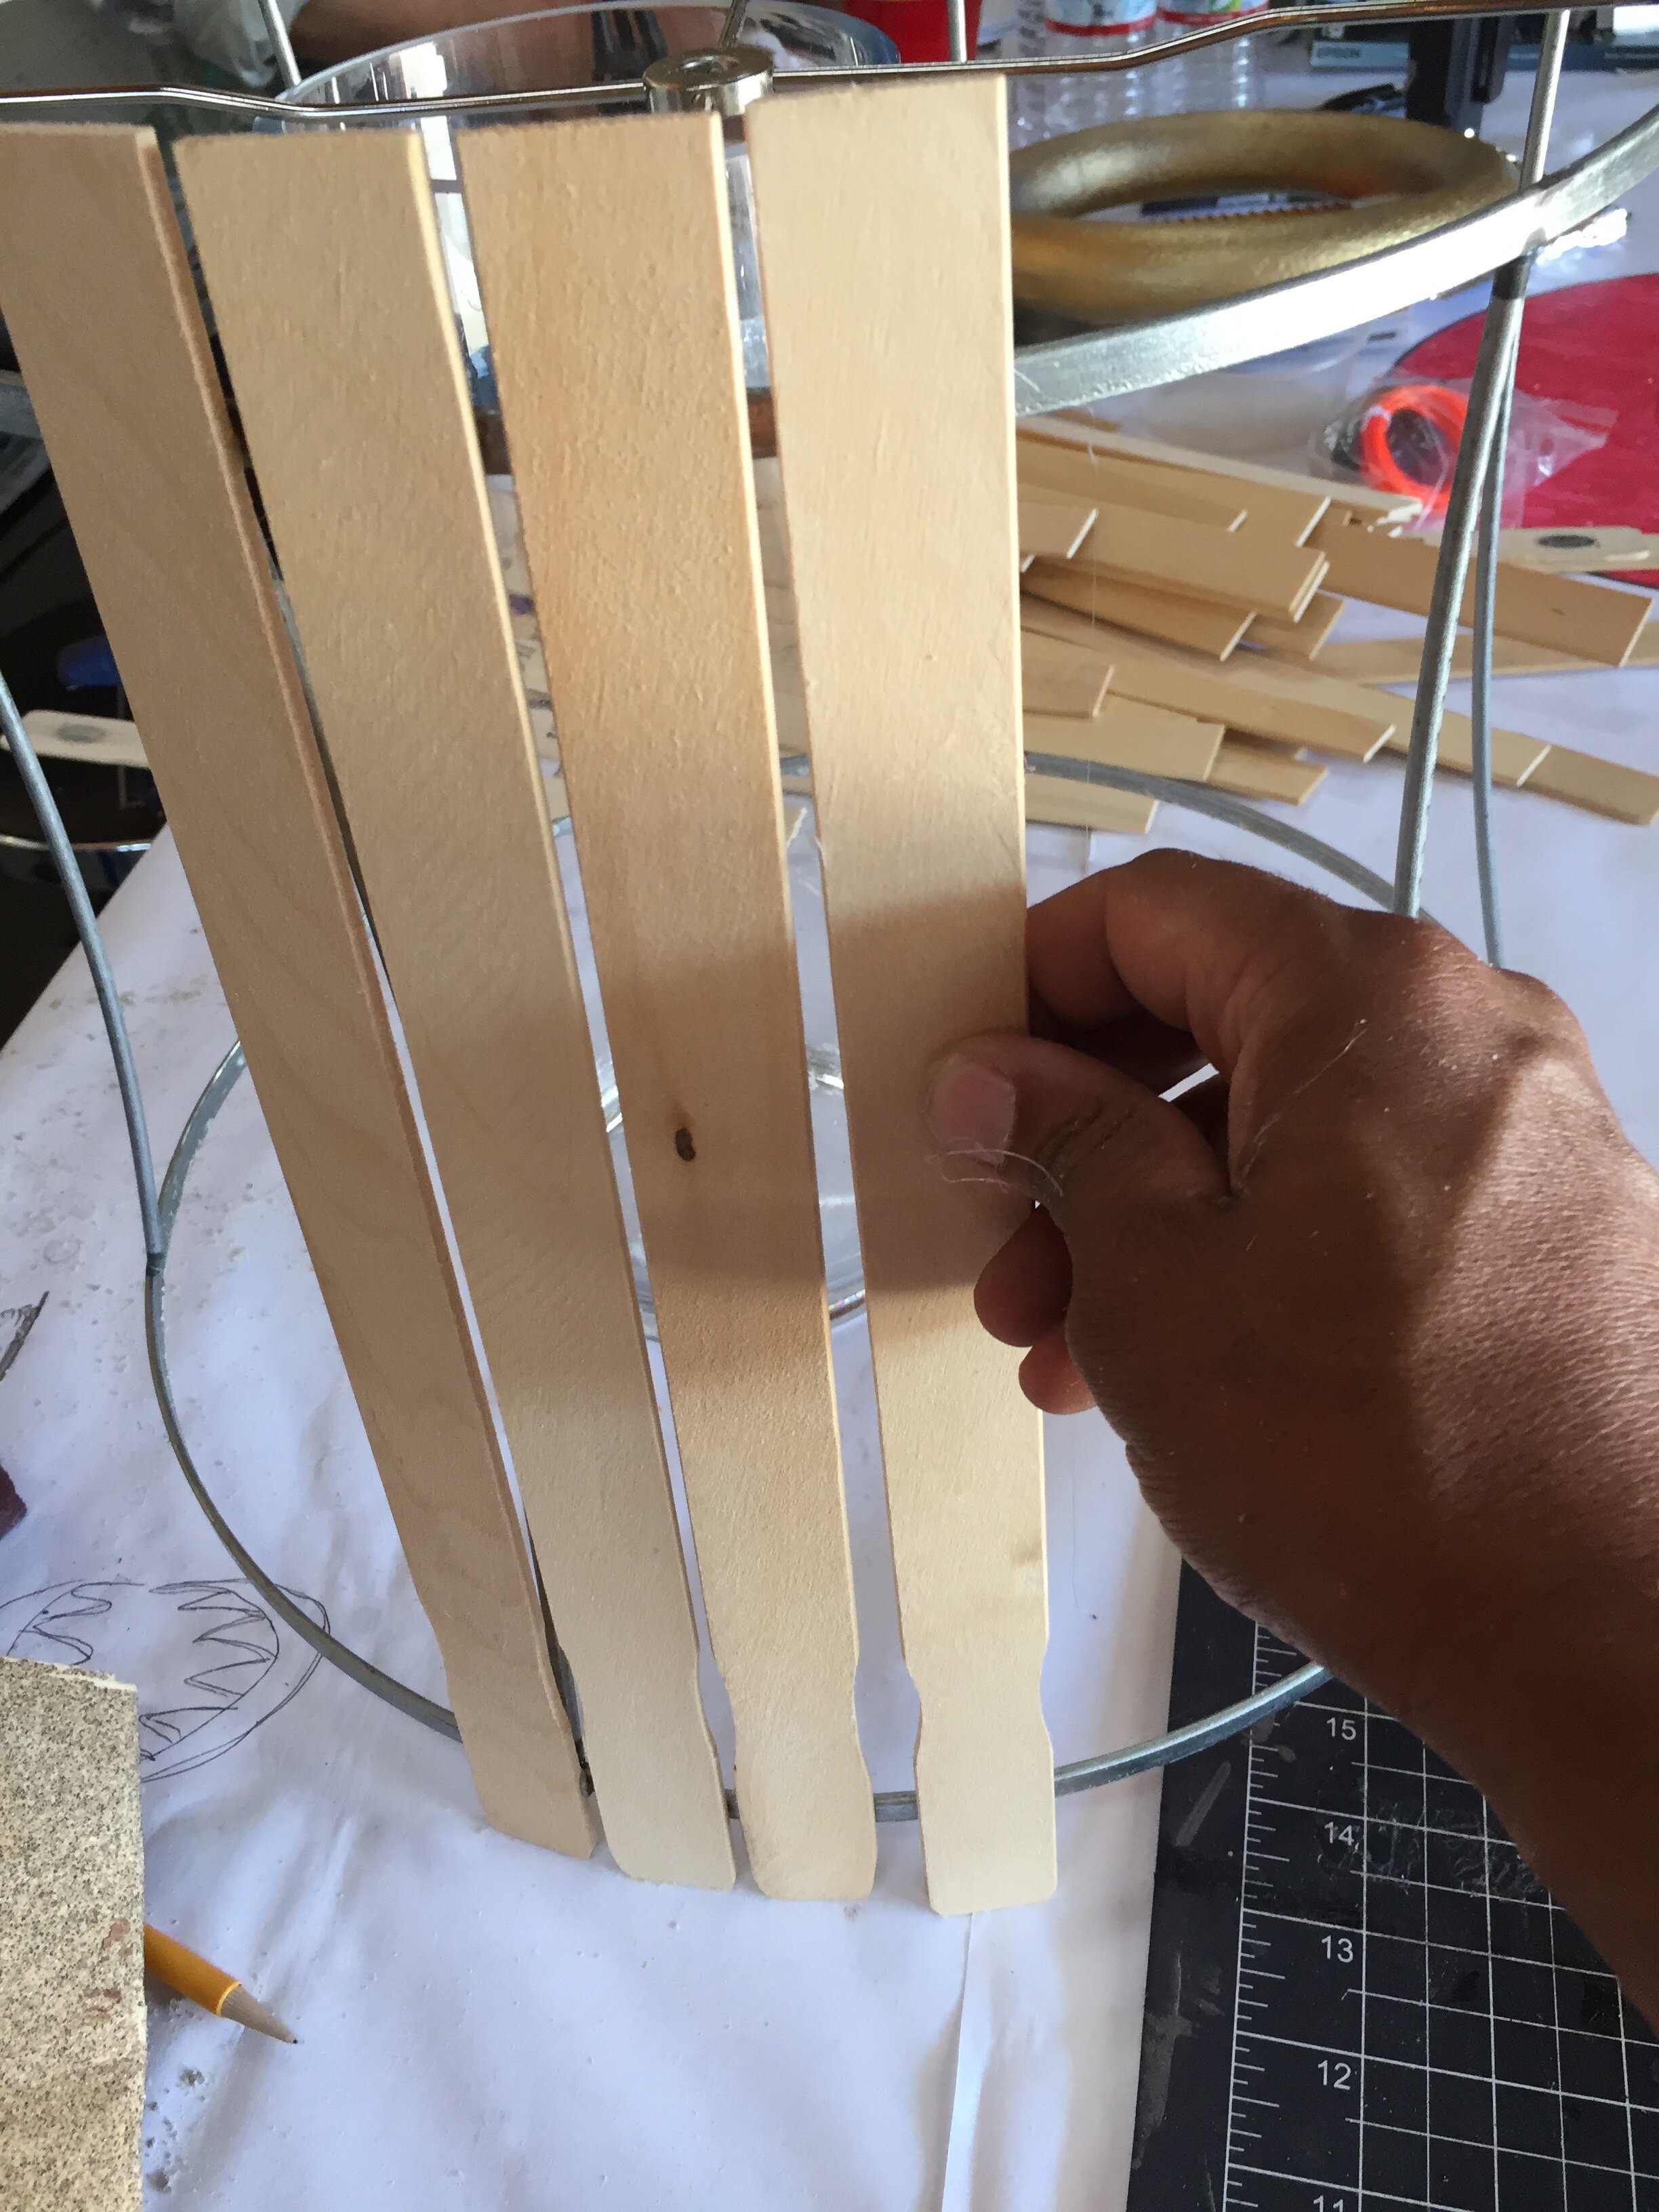
I wanted my stirrers to come down beyond the wire frame a little, so to make things easy, I found a vase that would lift the frame off the table about and inch and just rested the shade on it. Definitely not necessary, you can rest the frame on your work surface and have a nice flush edge as well.
IMG_2619
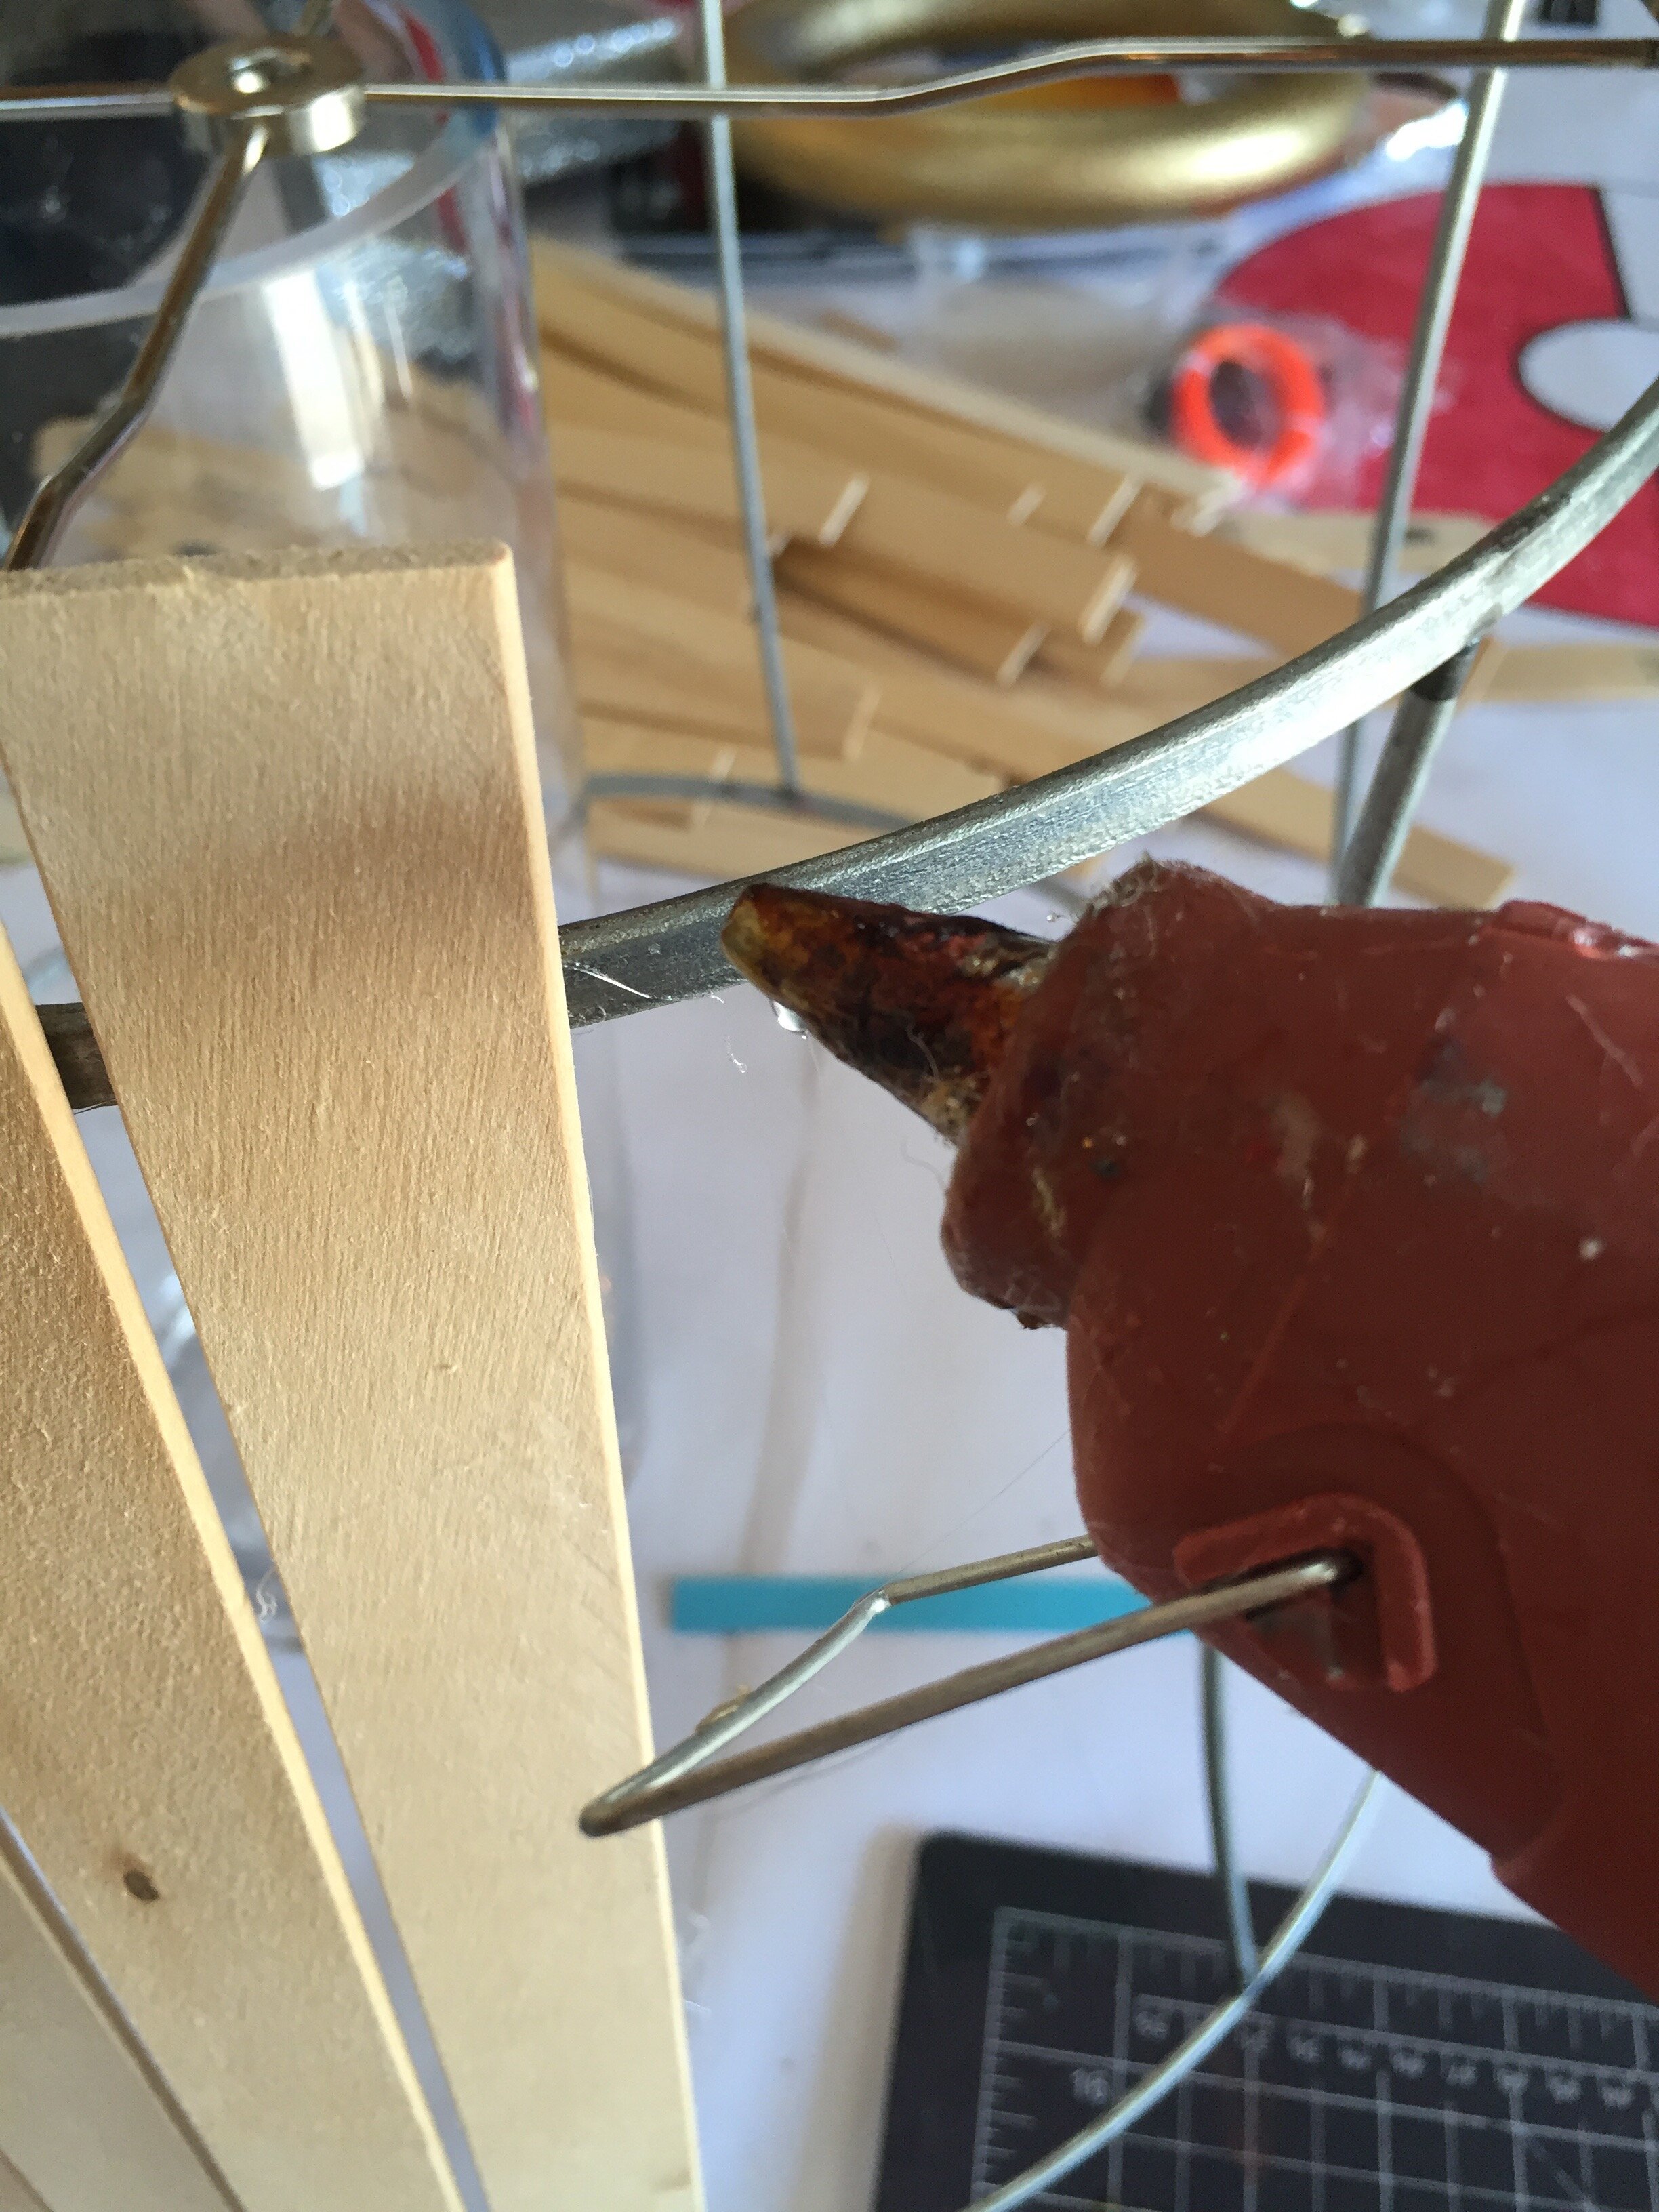
Start gluing your stirrers on, one at a time. I used a glue gun since it sets immediately and I was in a hurry. Hot glue doesn't always hold that well to metal, so if you go this route, use lots of hot glue. If you have time on your hands use a slower setting glue (like E6000) that works on wood and metal and just be patient and hold each in place until it's set. If you have a logo on your sticks, obviously make sure that's on the inside.
IMG_2618
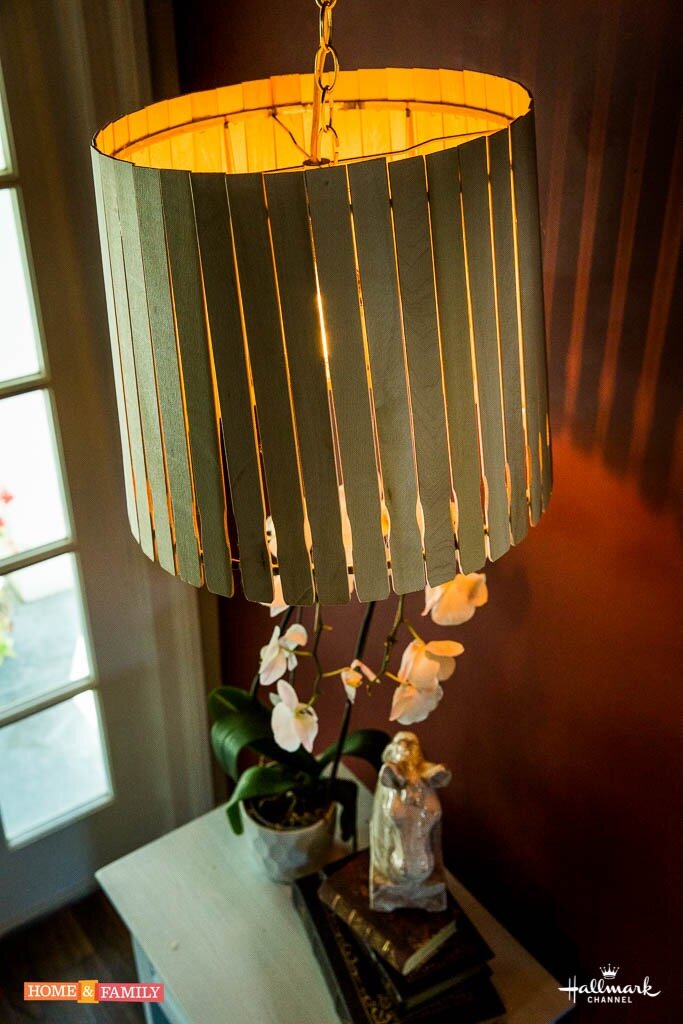
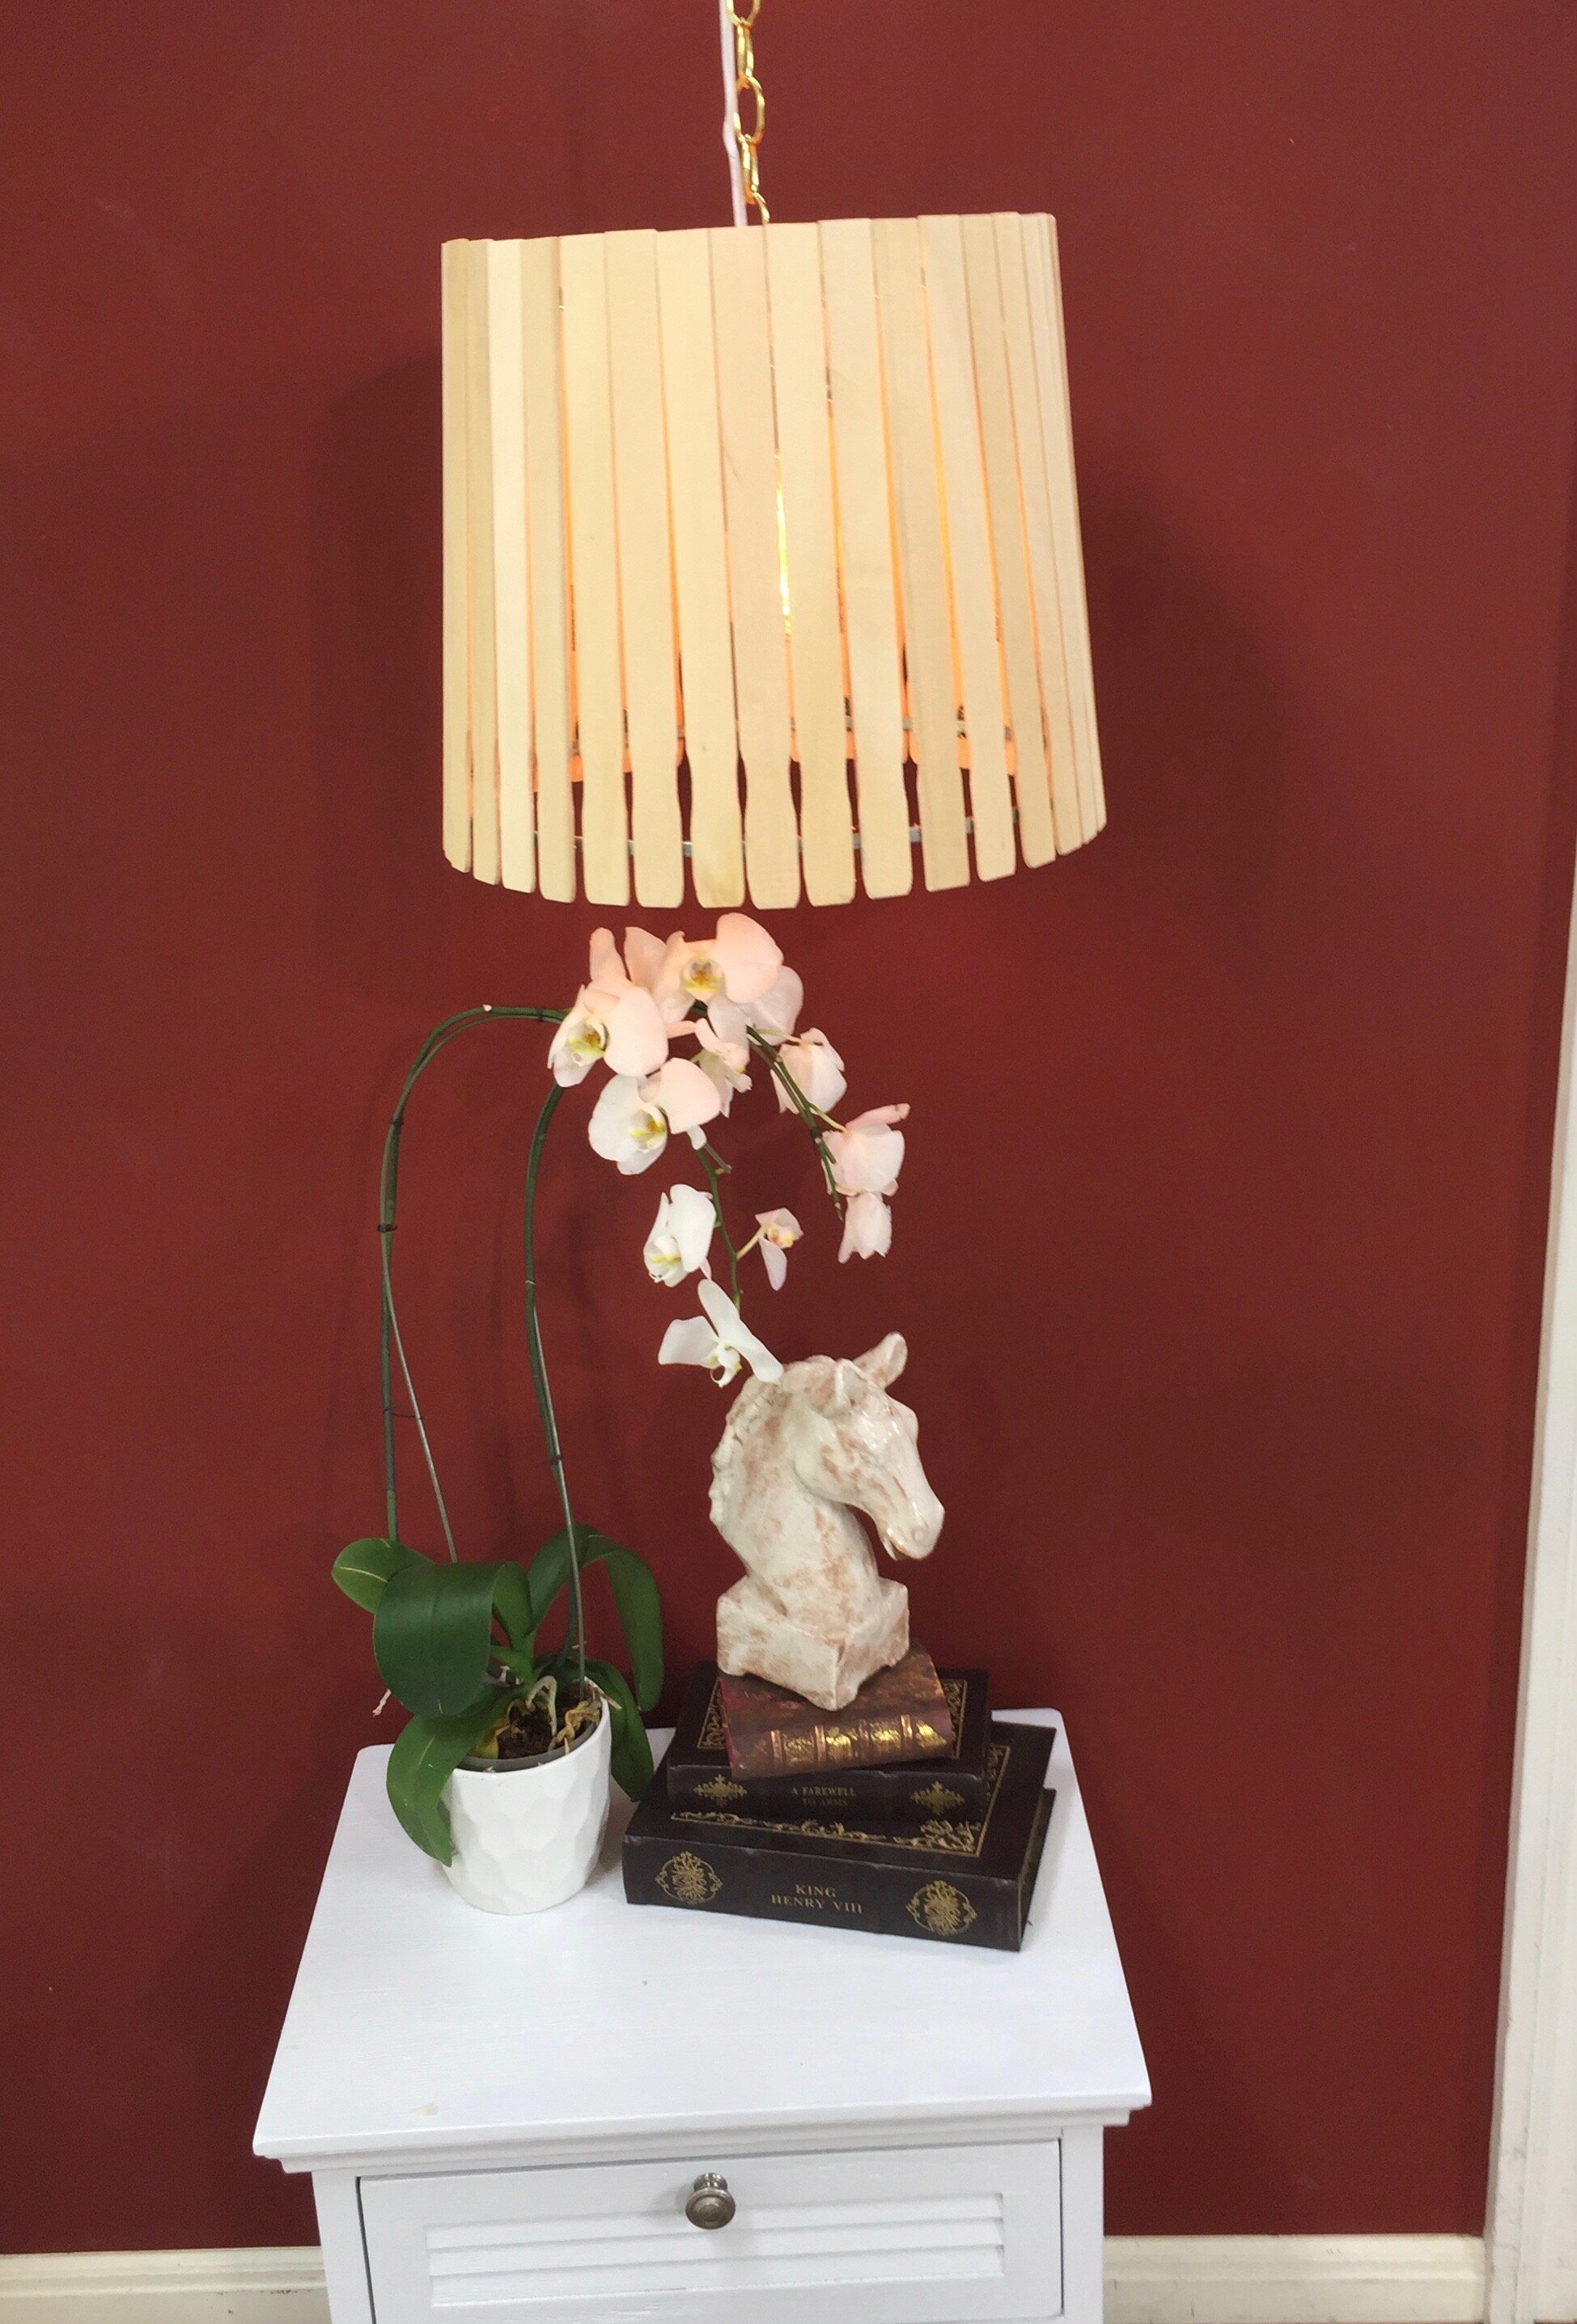
Resting the bottom of the stirrer on the table insures that your shade bottom will be even. Depending on how tapered your shade is, you're going to want to leave a little space between each stick. I left slightly more room at the bottom than the top between sticks to accommodate for the taper. When you get to the last 4 or 5 sticks, hold them up in place and judge spacing. You might need to put the last few in with a little more or less space between them so that it looks consistent and you're not left with a gap that needs half a stick. When you're done, feel free to stain or seal it with a coat of polyacrylic. Personally, I like the natural raw wood - keeps it true to it's origins.
IMG_2629