
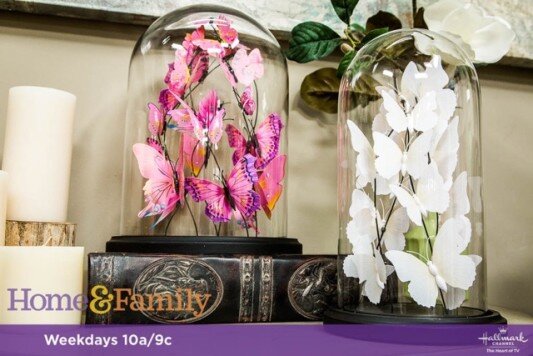
Butterfly Domes
IMG_5661
Nothing says lazy summer day like a gently floating butterfly. In an effort to keep those lovely days in mind all year long, I’ve created a butterfly cloche to remind myself that those summer days are never too far off. Easily done and completely customizable to match your decor they’re a wonderful little fantasy piece.
MATERIALS

IMG_5623
Cloche (also called a bell jar)Paper butterflies (you can find these on line in a myriad of colors)Bailing wireDrill or hammer an nailGlue gun
STEPS
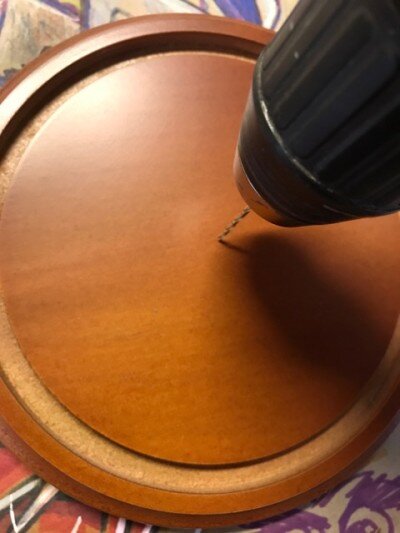
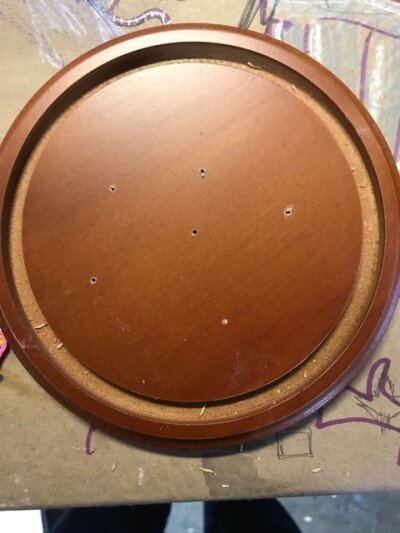
Pick a drill bit or nail that is the same size as your wire (so..itty bitty), and drill (or hammer) holes into your base. Depending on the size of your base and butterflies 5-7 should do it.
IMG_5596
IMG_5597
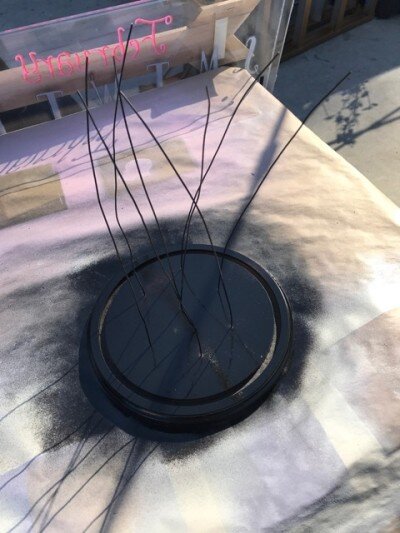
Cut your wire to be slightly shorter than your cloche and insert a piece into each hole. If you sized your hole correctly, you shouldn’t need any glue to hold the wires in place.

IMG_5600

IMG_5605
Once all in place, I gave mine a quick hit with black spray paint. Not necessary, but it does help all the wires disappear a little.
IMG_5608
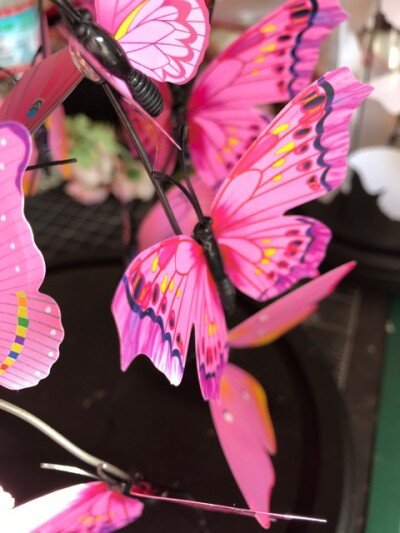
Prep your butterflies by folding the wings if they arrived flat. Start attaching them one at a time with a drop of hot glue. Start at the bottom of the wires with the larger ones and let them get gradually smaller as you work your way up. It’ll take some configuring to get them the way you want them. I gently bent the wires so they were all swirling in the same direction and put the butterflies so they looked like they were flying the same way.

IMG_5650
IMG_5651
Once you’ve got them how you want them - quick! Put the bell jar on…..before they fly away.

IMG_5659